For my CarnEvil Halloween party I want a few old fashioned freakshow exhibits, like the Incredible Snake Faced Lady.
You will need:
Polystyrene head (you can get these for a few pounds on Ebay)
Paper mache (newspaper or similar and PVA glue)
Acrylic paint (green, yellow, white and bronze) and brushes
Ready mixed wall filler and sandpaper (this stage is optional)
Sharpie pen (black) or permanent marker
Wig, flexible toy snakes and hair pins (I used a wig which I'd altered a few years ago for a Medusa costume)
Cover the head with paper mache using watered down glue (70% glue 30% water). Try to smooth the edges as much as possible and use small pieces around the facial features (I went on to use wall filler on top of the paper mache so I've no idea if you can just skip the paper mache steps).
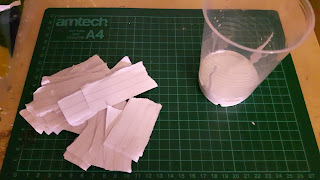 |
| I used small strips of note paper |
I did two layers of paper mache then left it to dry. Then I got bored waiting and used a hairdryer to speed up the drying time instead.
I started to paint the head to cover the lines on the paper I used. After 2 coats of paint, I decided this wasn't going to work well enough and coated the entire head in a thin layer of ready-mixed wall filler (thinned with a little water) and left it to dry again, before lightly sanding all over the head.
Lightly draw cross hatched lines over parts of the head where you want scales to appear. I chose the cheeks, forehead and neck.
Pencil in some scales.
Water down some green acrylic paint and roughly brush it over the entire head - you should be able to see the pencilled scales through the paint. Trace over the scales with a sharpie pen.
 |
| I forgot to take pictures before I started painting! |
 |
Cover the head in a rough diluted mix of green/yellow paint
and pencil in the scales, mouth and eyes |
 |
| Use a Sharpie pen to trace over the eyes, mouth and scales and add some little nostrils |
 |
| Paint the whites of the eyes with acrylic |
 |
| I dabbed on splodges of green and yellow paint |
 |
| Then blended them together |
 |
| I added a little bronze colour to the scales |
 |
| And painted the teeth white |
 |
| Get you a snake wig |
I used a green wig that I bought on Ebay a few years ago, to which I had hot glued dozens of rubber snakes. I think I made a fake bun on top of the head (using tights), pinned it using hair grips and then piled the snakes on top. You can probably find some tutorials for similar wigs online.
And that's it. Enjoy!